


OK, OK, I know I’m a week late with this! But better late than never right? Here’s the tutorial for making my RSVP tin treasure boxes. I’m going to give you instructions for my specific design, but obviously you can change it up to go with your theme! This post is long, buckle up. :)

{Image courtesy of Jenna}
Instructions for the tin:
The tin is a simple DVD tin, purchased from American Digital. To alter it, I used:
* Delta Ceramcoat paint in Oyster White
* Delta Ceramcoat metal primer
* Delta Ceramcoat sealer
* Grafix rub-on transfer paper
* Gocco and Gocco hand-stamping kit
* Natural and artificial bristle paint brushes
Prepare your tin with a coat of metal primer using your artificial bristle paint brush. Let dry.
Using your natural bristle paint brush and acrylic paint, cover the top of the tin with two coats, letting dry between coats.
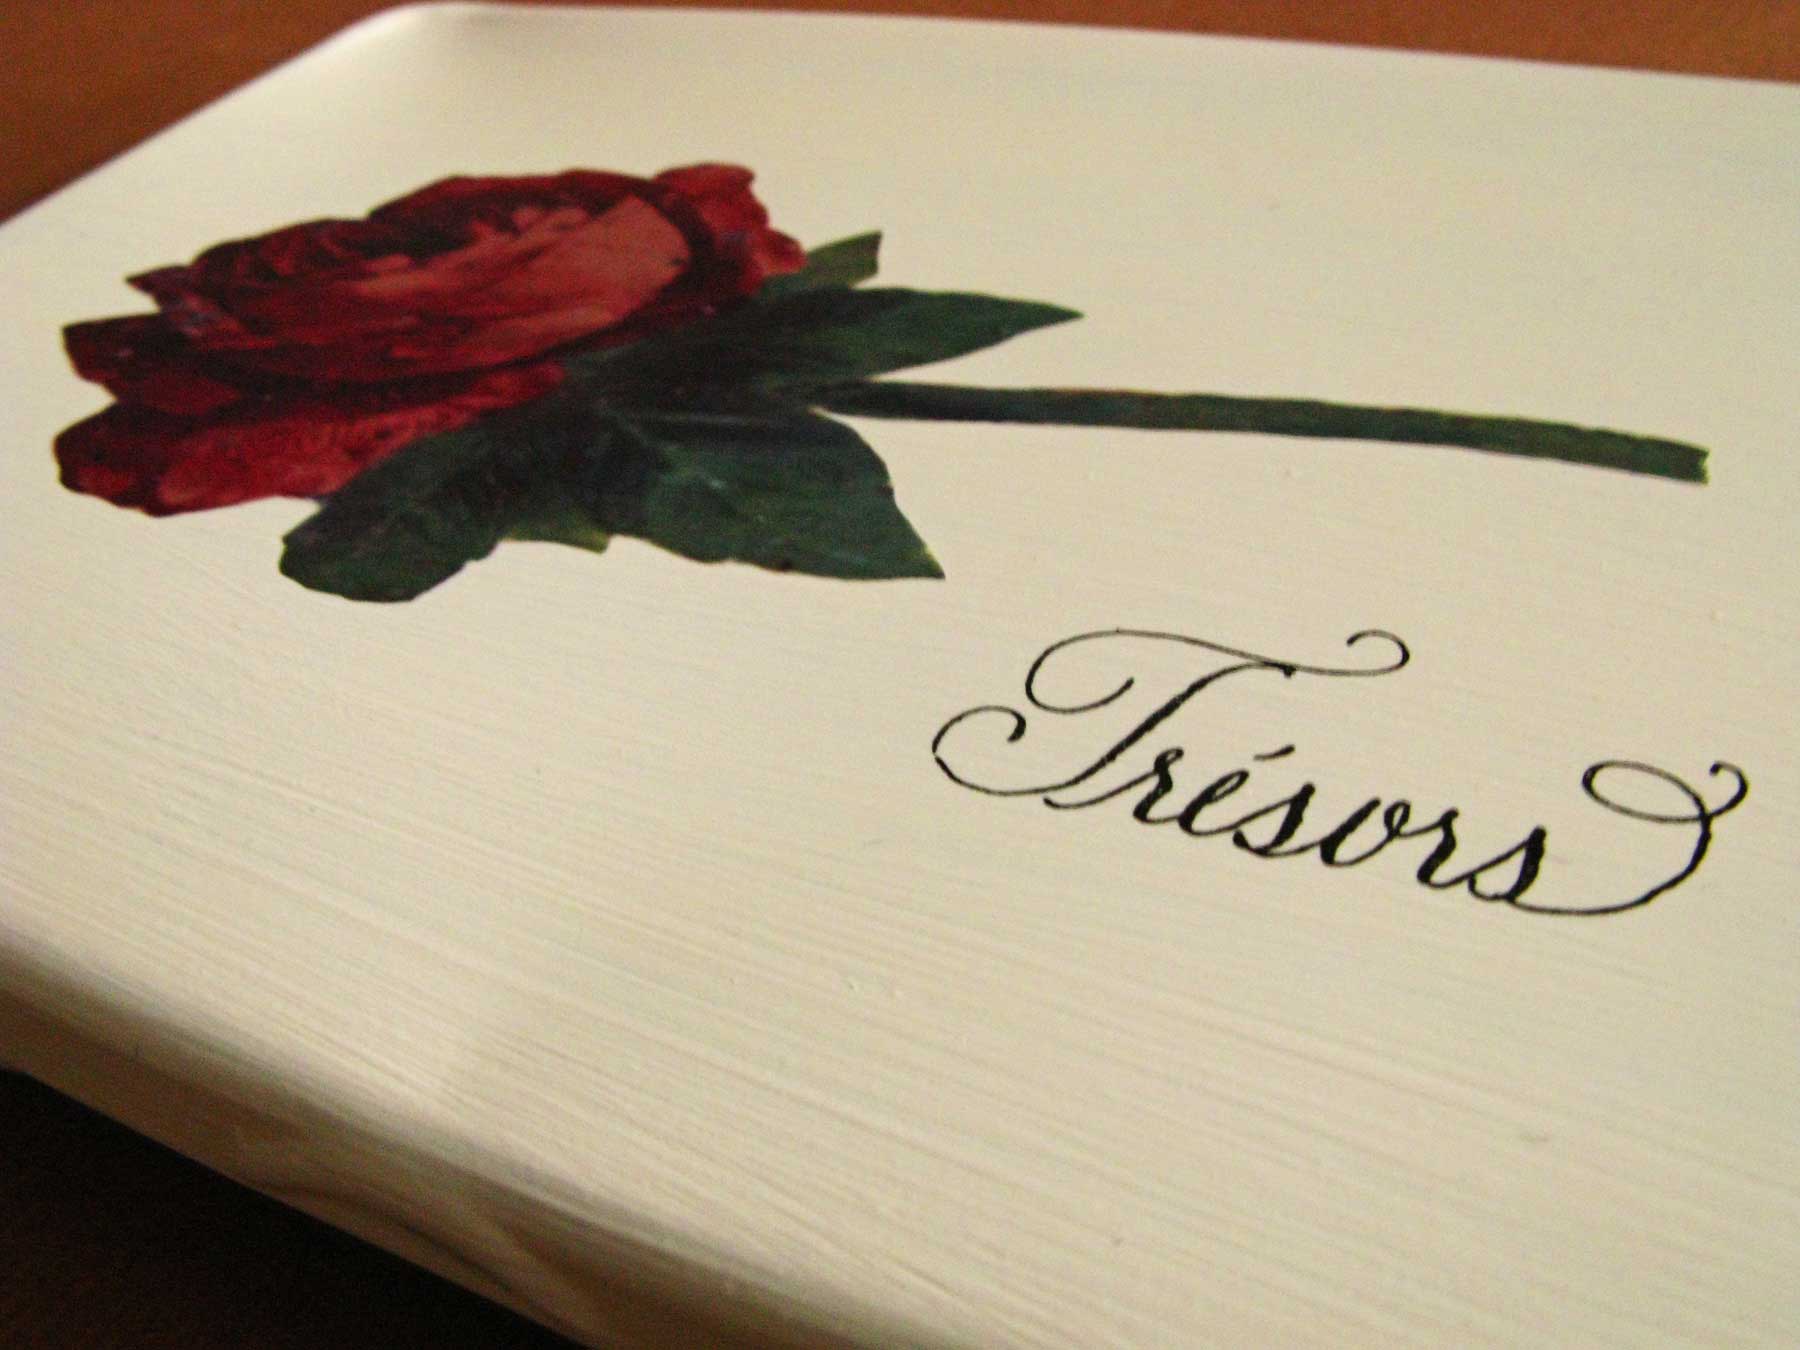
Following the instructions on the rub-on transfer paper, turn your design into a rub-on. I used a flower off of a high-resolution picture of an old cookie tin (manipulated a little bit to come up with my preferred design).

{author’s personal collection}
Laura Hooper scanned in and emailed to me the word “Tresors”. I then used Adobe Illustrator to turn it into a vector (probably not necessary unless you need to clean up the word). I printed on a laser printer and burned my Gocco screen then attached it to the hand-stamping kit, which is just a nifty contraption that basically turns your Gocco screen into a huge rubber stamp.
After I stamped on the word and let dry, I sealed the tin with two coats of satin sealer.
Instructions for the card enclosures:
On the Bonjour envelopes, I utilized another scanned word from Laura, which was burned onto a Gocco screen. I used my PG-11 to print the envelopes. I then lined them with paper from Paper Source, using PS’s envelope liner template for a 4-bar size envelope. For the enclosure card, I created a design and Gocco-printed in gold ink.

{Image courtesy of Jenna}
The Le Plan d’Evenements, Tresors, and Logement notecards, along with the RSVP tag, were created using similar methods.


{Images courtesy of Jenna}
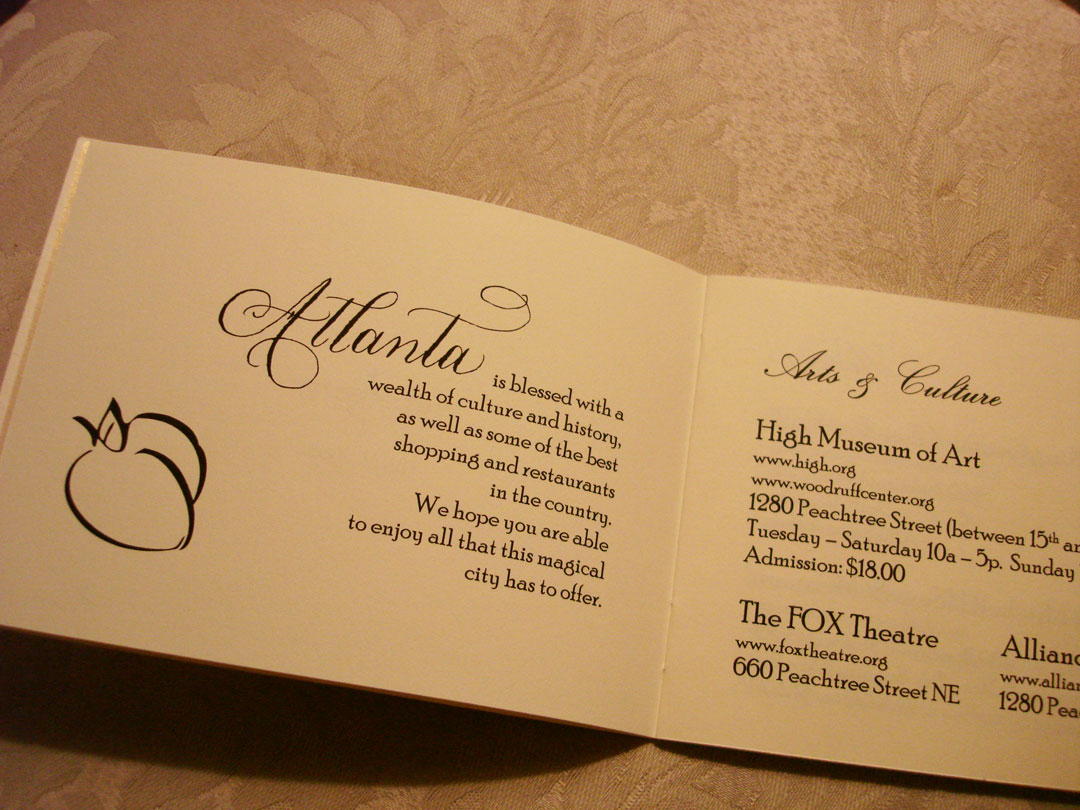
Instructions for the area information booklets:
For these, you will need cardstock, text-weight paper, staples, and a lining paper (such as vellum or Evanescent paper). I designed the entire booklet in Microsoft Word (yes, I know, I like Word!). Again, I used Laura’s calligraphy for the cover set inside a free frame design I found online.
I began by cutting all of my papers into 4″x11″ strips. Thankfully my printer does reasonably well with cut-down paper. After carefully printing my layout, I used my paper trimmer to score the strips and fold into a booklet. Finally, I printed the cover on my Gocco and then stapled it all together.


{author’s personal collection}
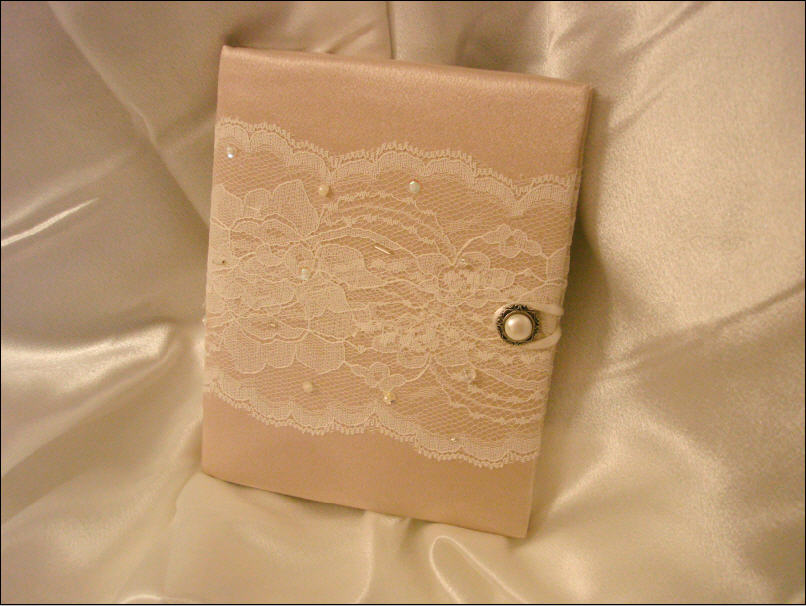
Instructions for the RSVP sleeves:
My save the dates used a beautiful pattern of raschel lace, and I had purchased BOLTS of it, so I knew I wanted to use it in the tins.

{author’s personal collection}
I purchased half-moon enclosures from Paper Source and used the lace to sew sleeves to go around the enclosure. I then used 1/8″ cream ribbon to wrap around the lace and attached the tag printed with RSVP and a small charm to the knot. As I mentioned before, the RSVP cards were thermographed and were the only element of the tin that wasn’t DIY!

{Image courtesy of Jenna}
Lastly, I Gocco printed return address envelopes for the RSVPs.

{author’s personal collection}
All of the goods were packaged in peel and stick DVD mailers purchased {here} and finished off with a label I designed in Photoshop.

{author’s personal collection}

{Image courtesy of Jenna}
Hope that helps! I’m glad to answer any and all questions!