Organza Flower Headband

Sometimes inspiration boards, well, inspire me.  And this peach pink and gold inspiration board from last week was one that I could really see building an entire wedding around.


sourced here

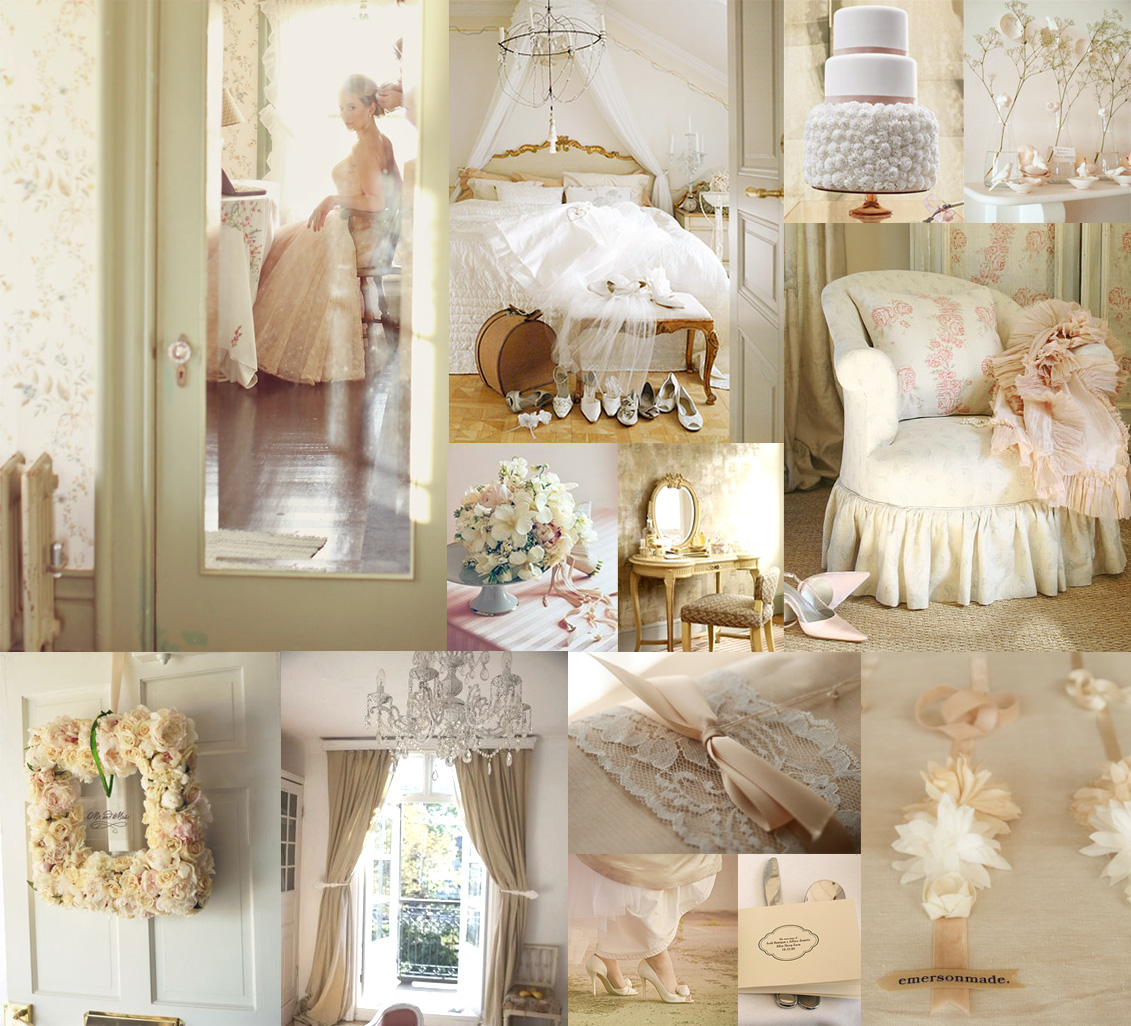
So I decided to whip up a little project to pair with the board, and settled on a feminine headband with fluffy organza flowers.

organza-flower-headband

Supplies needed:

  • 1/2 yard of toast organza
  • 1/2 yard of ivory organza
  • two neutral color ponytail holders
  • your choice of beads
  • needle and nylon thread
  • a length of ribbon, measured for your head size (mine was roughly 18″)

Instructions:

Have fun making organza flowers using Reese Dixon’s tutorial found here.

  1. Cut 3-5 pieces of organza into rough flower shapes.  There is no science to it!
  2. Hold the edges of the organza over a candle, the fabric will then melt and curl up to form “petals”.
  3. Layer the pieces on top of each other and stitch together in the center with invisible nylon thread.
  4. Add beads to the center of your flowers – I used some small seed beads that were crystal clear and pearly white, as well as miniature pearls and larger gold and clear beads.  10-12 beads per flower seemed to be about right!  Because you will be sewing your flowers to the headband, you can knot the flowers underneath the last layer and the knots will be hidden.

As you can see, I made several flowers, but my headband only used two small toast flowers and one larger ivory flower.

how-to-make-organza-flowers

To create the ribbon headband:

First, knot two ponytail holders together, like so:

closure-for-ribbon-headband
source

At each end of the ribbon, sew the ponytail holder into the ribbon by folding the ribbon into itself twice (to hide the frayed edge) and sliding the ponytail holder in to the pocket the fold created.  Straight stitch two lines to account for wear and tear and pulling on the stitches and be sure that one line of stitching is very close to the ponytail holder to keep it in place.

ribbon-headband-tutorial-1

Take care not to twist the ribbon, and be sure to knot your thread on the underside of the headband where it will be hidden.

ribbon-headband-closure-2

ribbon-headband-closure

To complete the headband, arrange the organza flowers on the ribbon and pin them.  Try the headband on to see if the placement is as you like it.  When you are satisfied, stitch the flowers to the ribbon with the invisible nylon thread and voila!

fabric-flower-headband-tutorial

In action:

diy-organza-headband-tutorial-wedding-ideas

Cost:

1 yard of fabric: $8 at my local craft store
Beads: I had these on hand from other projects, but you can find lovely beads also at your craft or art store for $3-$10 per bag
Ribbon: I used 18″ from a spool of ribbon that cost $3

Total = ~$15.00

OK, now who wants an organza flower headband? I’d love to give this one to someone who will make good use of it!

we heart your comments!
  1. Awesome! I’d totally love to have one and I’d make great use of it in my next photoshoot!
    .-= Sarah’s most recent blog post: Piper + Curtis =-.

  2. Great tutorial! I am 99% sure I wouldn’t look nearly as cute as you wearing it, but I love it.

  3. Wow, this is so awesome. I really love it. :) Will definitely try this out.

  4. This is so cute head band,i like it so much!

    winnie

  5. Emily writes... {January 13, 2010 at 5:04 pm}

    Gorgeous! So fun and flirty. Thanks for the tutorial, Ami.
    .-= Emily’s most recent blog post: 2010 Preview =-.

  6. Wow, that is such a gorgeous use of Reese’s flowers. BEAUTIFUL! Thanks so much for the great idea, I’ll be linking.

  7. Kristin Stout writes... {January 16, 2010 at 10:15 am}

    Very pretty! I love organza flowers, but had never thought of the great headband idea!

  8. Nancy writes... {January 16, 2010 at 3:34 pm}

    That is beautiful! U would wear that in a Heartbeat!
    Thanks so much for sharing.
    Fondly, Nancy
    http://www.coeurdalenegifts.com

  9. I love this headband…so romantic…I would ♥ to win!!!

  10. I’m sure that I was not lucky enough to come across your blog in time for the fantastic headband giveaway. Shoot.

    Well, I just have to say that I am in LOVE with this website. It’s everything I wanted for my wedding and more. You guys are a-MAZING. :)

  11. Such an awesome idea- thanks for sharing the tutorial! Simply beautiful head piece.
    .-= The Oceanside Bride’s most recent blog post: A Costa Rica Wedding =-.

  12. This is too pretty! Mine isn’t as romantic, but I made one from vintage scrap material and floral wire. If you get bored one day…here is the link:
    http://www.potholesandpantyhose.com/A/Arts_%26_Crap.html

  13. Thank you for sharing this tutorial, I loved it; I”m alas looking for new ways to make fabric flowers. I buy my pre cut fabric circles on Etsy from SweetSweetCircles to save me the time and money (they’re pretty darn cheap lol) totally recommend them to anyone looking to make this project! http://www.etsy.com/shop/sweetsweetcircles

  14. Marina Agassi writes... {April 28, 2011 at 10:15 pm}

    Oh my goodness, this is gorgeous, love the detailed steps and the thoughtful and beautiful pictures. This will definitely be my next project :D

  15. Natalie writes... {May 25, 2011 at 12:16 pm}

    I love this idea. I am getting married this summer and those are my wedding colors. I am aiming for a vintage feel and this basically sums it all up! Very cute, I know I would put great use to that adorable headband. It is perfection.

  16. lovethe flowers

  17. Oooh I love these! I am studying abroad in London for a year in the fall, and I wanted some cute new looks to take with me that I could make so I could save money :) Thank you!

  18. Beautiful idea, thanks for sharing!

  19. Wow! These flower headbands are a great inexpensive infusion of style! I haven’t worked with Organza in the past, but I will have to try my hand at it! Thanks for the idea!

links to this feature:
Leave a Comment