


One area where we decided we could save money was in all of the print materials. I had a pretty specific idea of how I wanted the final invitations to look and knew we could create a simple look on our own.
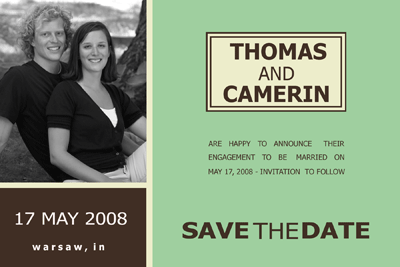
We completed the Save the Dates before we actually had our professional engagement session so they included a photo we took on our own with the help of Thomas’s aunt. The color palette was already set at this time so they began to set the tone for everything to follow. The postcard was created using Adobe Photoshop and simply had to be dropped in the mail.
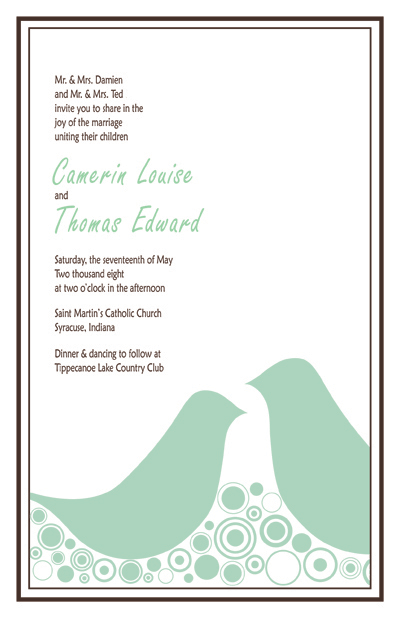
The invitations, response cards, and maps were a bit more difficult. Thomas modeled the bird design from scratch using Rhino and 3D studio (he’s an architect). Our inspiration came from two stylized bird prints I purchased from Etsy seller joom in the fall. You will see the birds and dots appear in little details throughout. We created all three of the invitation items on our own using Adobe InDesign.

Since the church and reception site were about 20 minutes apart, we created a map for our guests. The map itself was designed in Adobe Illustrator. If you have access to the program you can basically draw the necessary lines over a Google map to create your own custom route.

The envelopes and addresses were printed thanks to Excel and a mail merge in Word. Both fairly simple tasks if you are adept with the computer. We printed everything ourselves using boxed kits my mom purchased for half off. And we found stamps with green and brown in them.

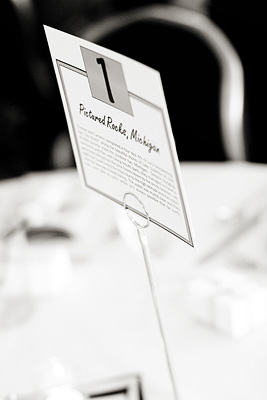
The ceremony programs, table numbers, and escort cards were a little more fun to create. Once again we enlisted the help of InDesign to complete all three tasks.
My original idea for a program was to have several sheets of card stock stacked together attached at the top with a piece of ribbon. Well, when it gets down to two weeks before the wedding and the Kinko’s guy can’t figure out how to cut them correctly you move on to plan B, the tri-fold standby.

The table number cards each included the name of a place we had visited together and a little story about our time there. The guests really enjoyed this personal touch and many of them read every single one!
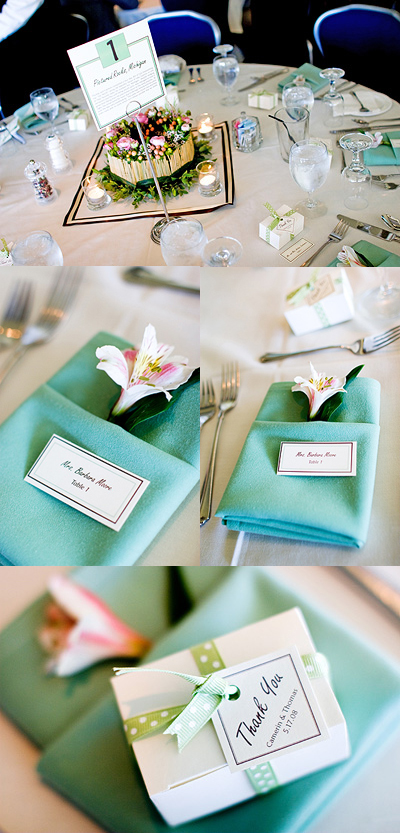
The favor boxes were purchased on clearance in packs of 50 by my mother. We designed the little tags for each one.
Last but not least, we custom designed a thank you card featuring wedding portraits and had it printed through Adorama. At $.99/card, they were the least expensive site we could find that would print it how we wanted (and include envelopes). Of all the items we created, the thank you cards received the most comments and praise by far.
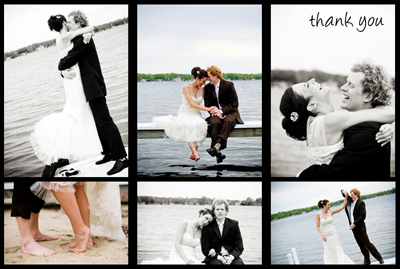
The above image was placed on a cream card with a light grey border surrounding it. We were sure to include our new address, email, and blog so all our loved ones could stay in touch.
*all professional photos credit to Nicole Green