


As promised, here are a few more of our favorite DIY details from our wedding. As I mentioned yesterday, going the DIY route was a great way to personalize our wedding. Menus, programs, and custom coasters aren’t new ideas for a wedding, but because my husband and I were able to do them ourselves, each one of these details helped to make our wedding a true reflection of us as a couple.
Ceremony Programs
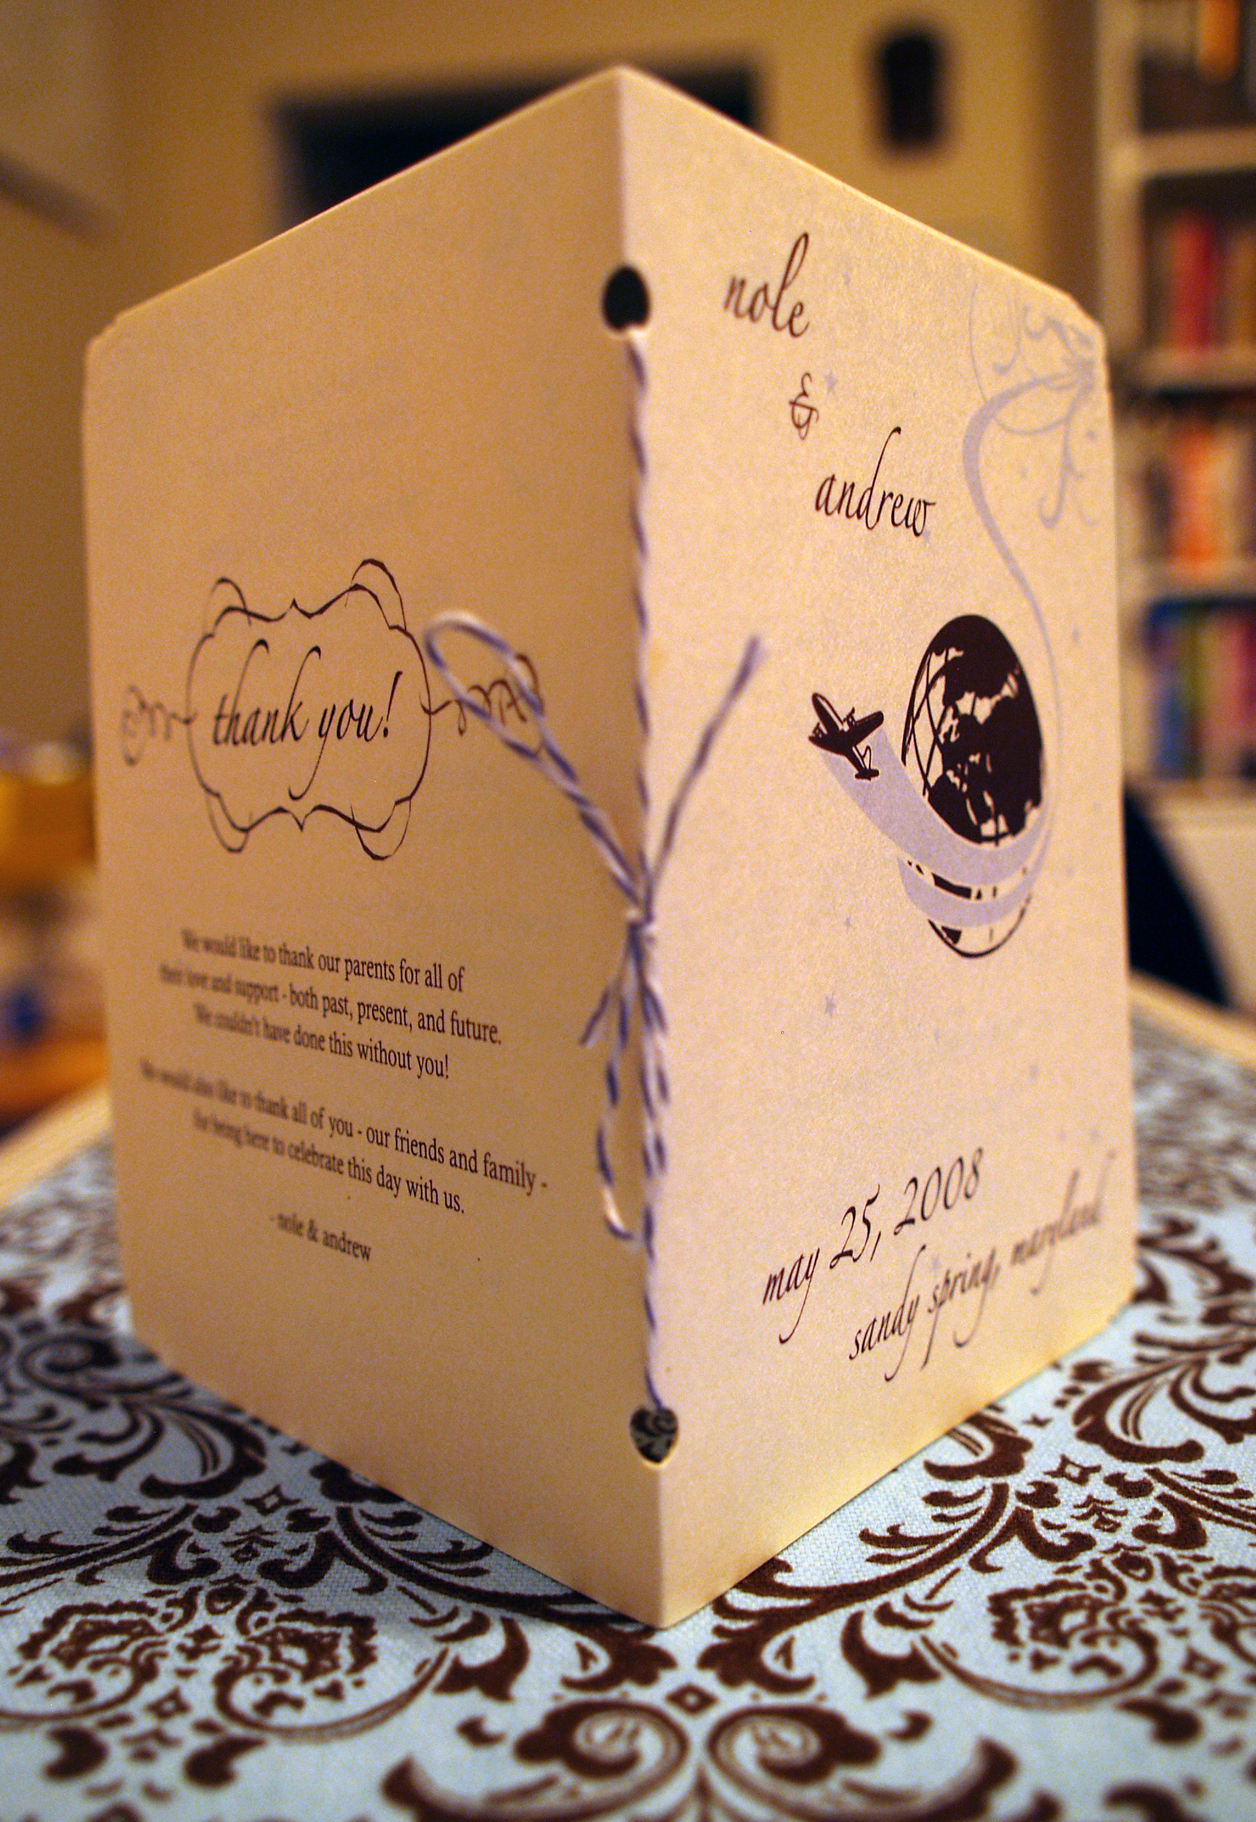
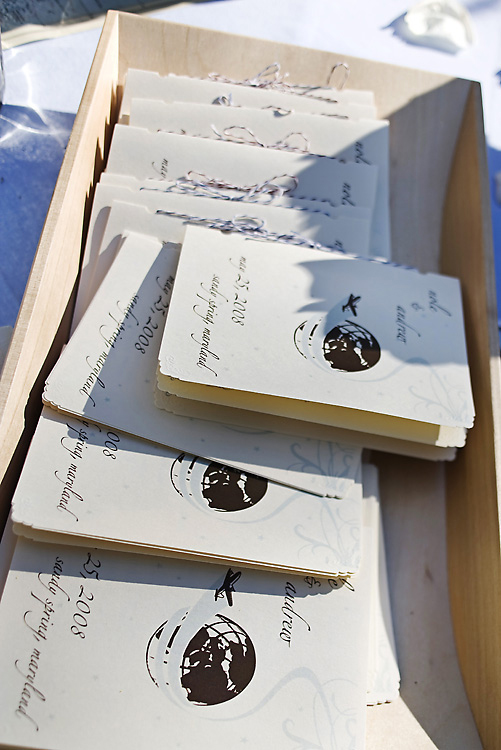
Since we were planning a small wedding, we originally didn’t plan on having ceremony programs. As we got closer to the wedding, however, we decided that it would be a good way of giving our non-Jewish guests (which included my husband’s entire family and most of our guests) the background behind the Jewish traditions that we chose to incorporate into our service.
{photos by me}
{photo by Punam Bean}
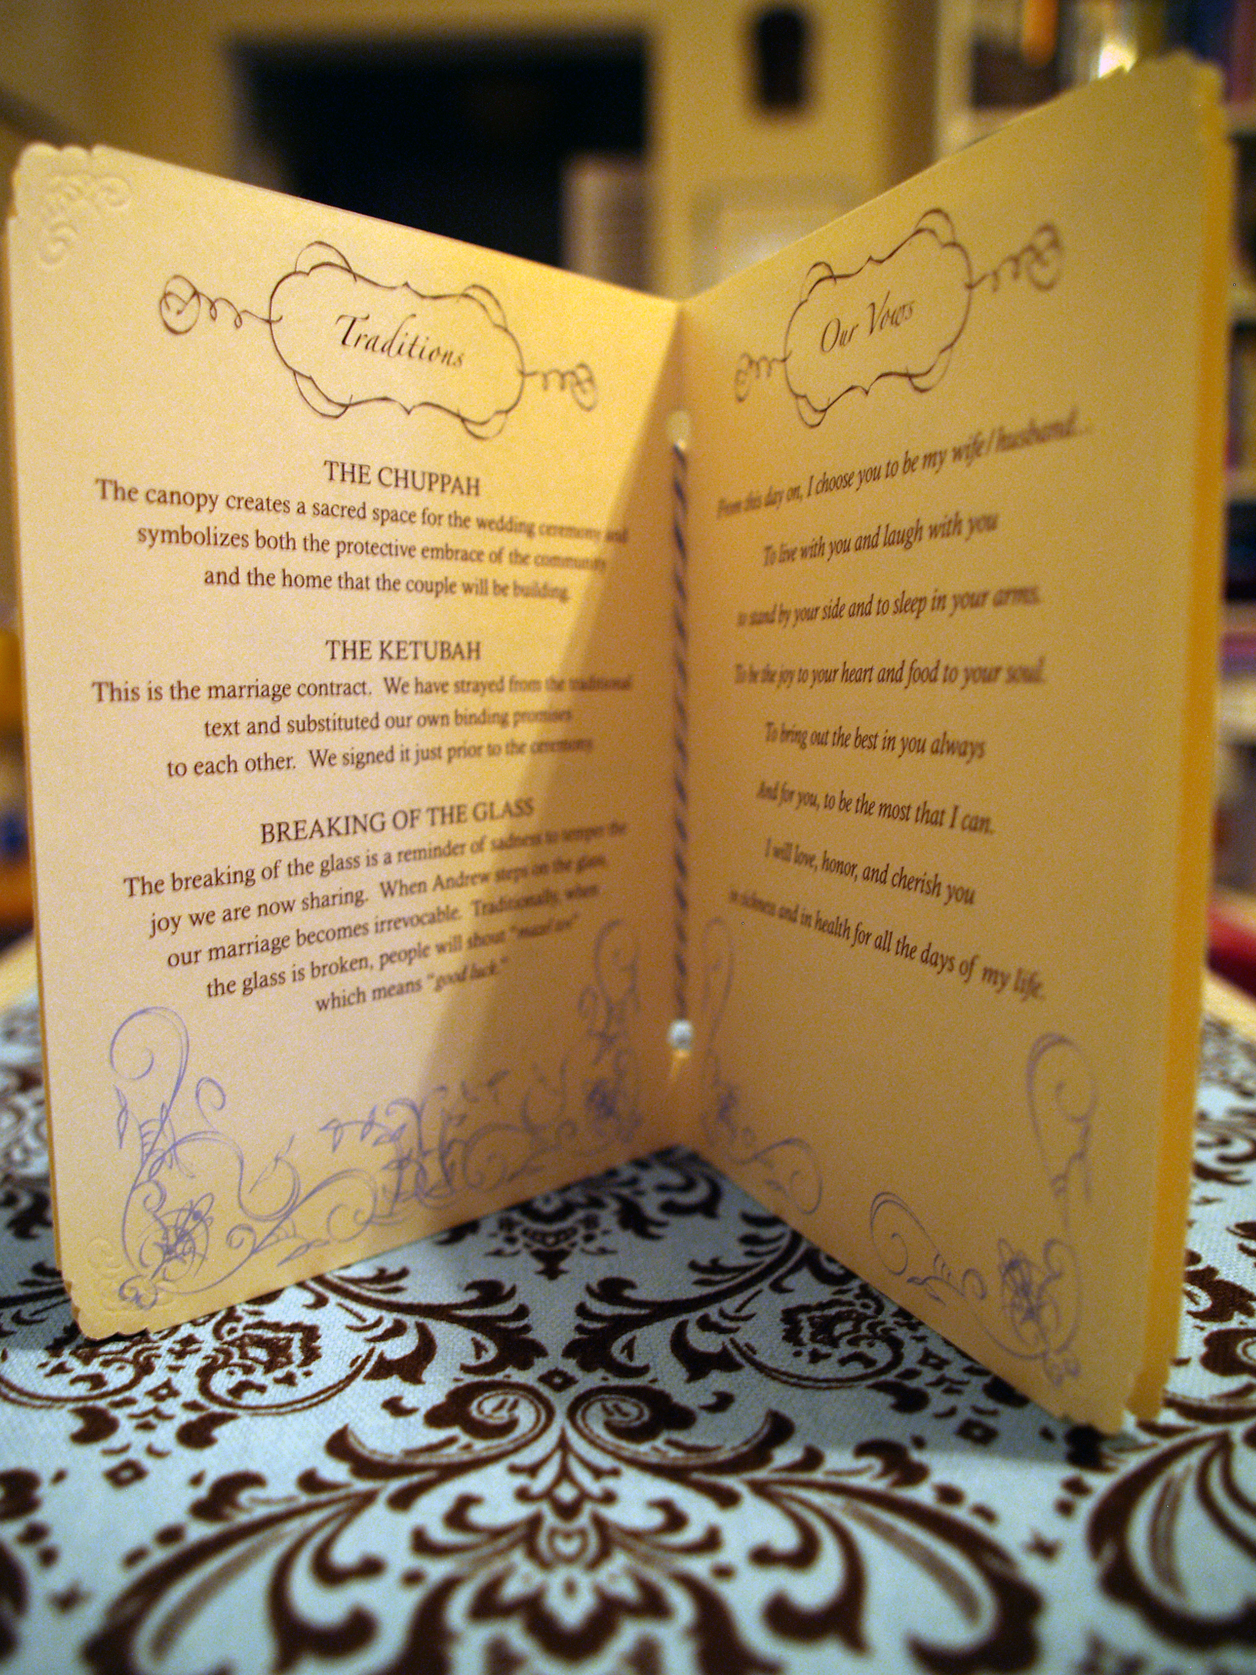
I designed the programs using one of the graphics from our invitation suite for the cover and printed them a few days before the wedding. I was also inspired by this wedding to make booklet-size programs so that guests could put the programs into a suit pocket or small purse and keep them as a memento from the wedding. In addition to the names of our wedding party, order of the ceremony, and traditions, we included the text of our ceremony and ring vows, and a word of thanks to our families and friends for their support. We embossed the corners of each page using a combination craft corner-punch and embossing tool, and used blue and brown baker’s twine to bind the pages together.
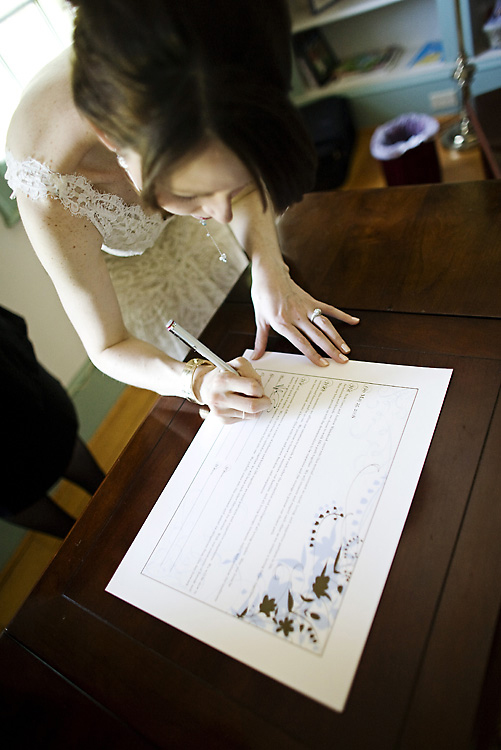
Ketubah
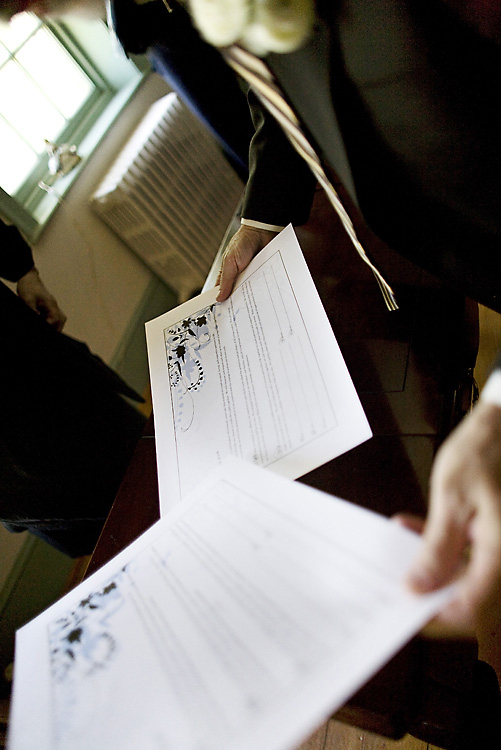
I was inspired to make my own ketubah (Jewish marriage contract) by this beautiful ketubah featured on Something Old, Something New. The design was inspired by this invitation suite from Hello!Lucky, but then combined with graphics that I used throughout the wedding in our DIY projects.
{photos by Punam Bean}
I researched different wording for ketubahs online and worked with my husband to figure out the wording that we thought worked best for us before confirming the final text with the Cantor who performed our ceremony. My dad printed our ketubah on watercolor paper using his photo-quality home printer (he made two just in case) and was so proud of his handiwork on the day of the wedding.
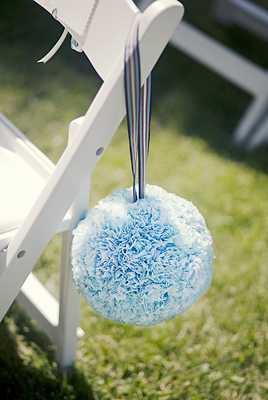
Pomanders
We wanted to have some sort of aisle decoration for the ceremony, but since our floral budget was relatively small we knew we couldn’t afford live floral arrangements. These tissue paper pomanders from VintageGlam were the perfect solution and yet another way to tie everything together using our wedding colors. They looked absolutely perfect on the day of the wedding.
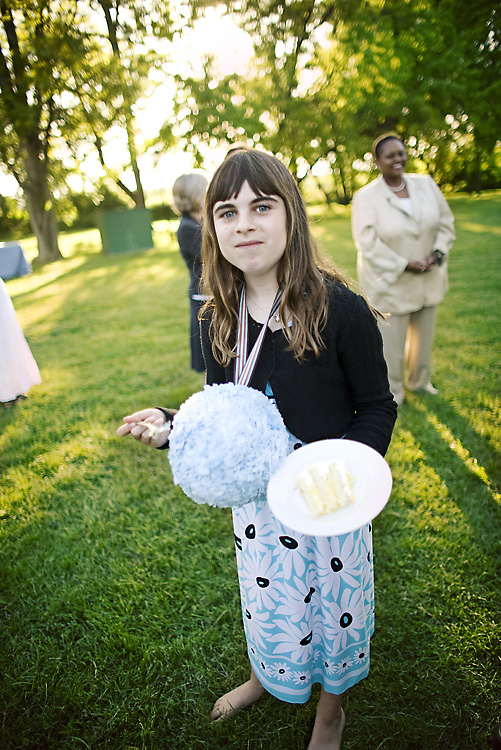
{my niece, wearing one of our pomanders during the reception. both photos by Punam Bean}
You can find the full instructions on VintageGlam, but just a head’s up — this project is really a time- and labor-intensive project! Each pomander requires approximately 40 tissue paper flowers, and each tissue paper flower requires five sheets of tissue paper that must be folded and fluffed into the shape of a flower. We made a total of 400 flowers for ten pomanders, and since it was mostly just my fiancé and I, this project took a long time. The result was totally worth it – but if you’re able to, I would recommend making this a group project with bridesmaids or supportive friends to help with all the folding!
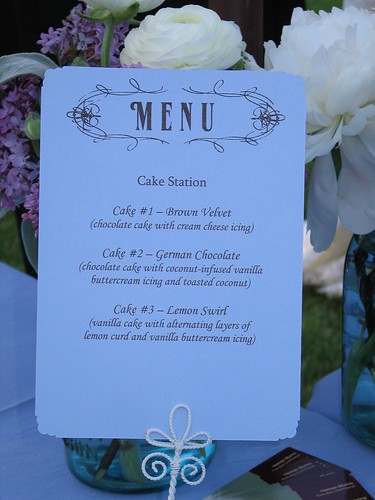
Menus/Coasters/Reserved Cards
The menu for our reception consisted of Middle Eastern and Mediterranean-inspired tapas dishes served at food stations near the guest tables. Several of our guests were vegetarians or had food allergies, so we knew that we would need menus to help those guests figure out what they could eat. During our initial inspiration phrase in our wedding planning, I came across these menus in MS Weddings and loved the idea for our own wedding. I used my gocco to print the menu graphic at the top of several A7-size flat notes, and then printed the specific menu text using our home ink jet printer.
{photo by Charles Freericks}
The coasters weren’t motivated by any practical considerations — I just really liked the idea of having custom coasters that could serve as another memento from the wedding. I designed and printed them myself in two sets, one using light blue ink and another in purple ink.
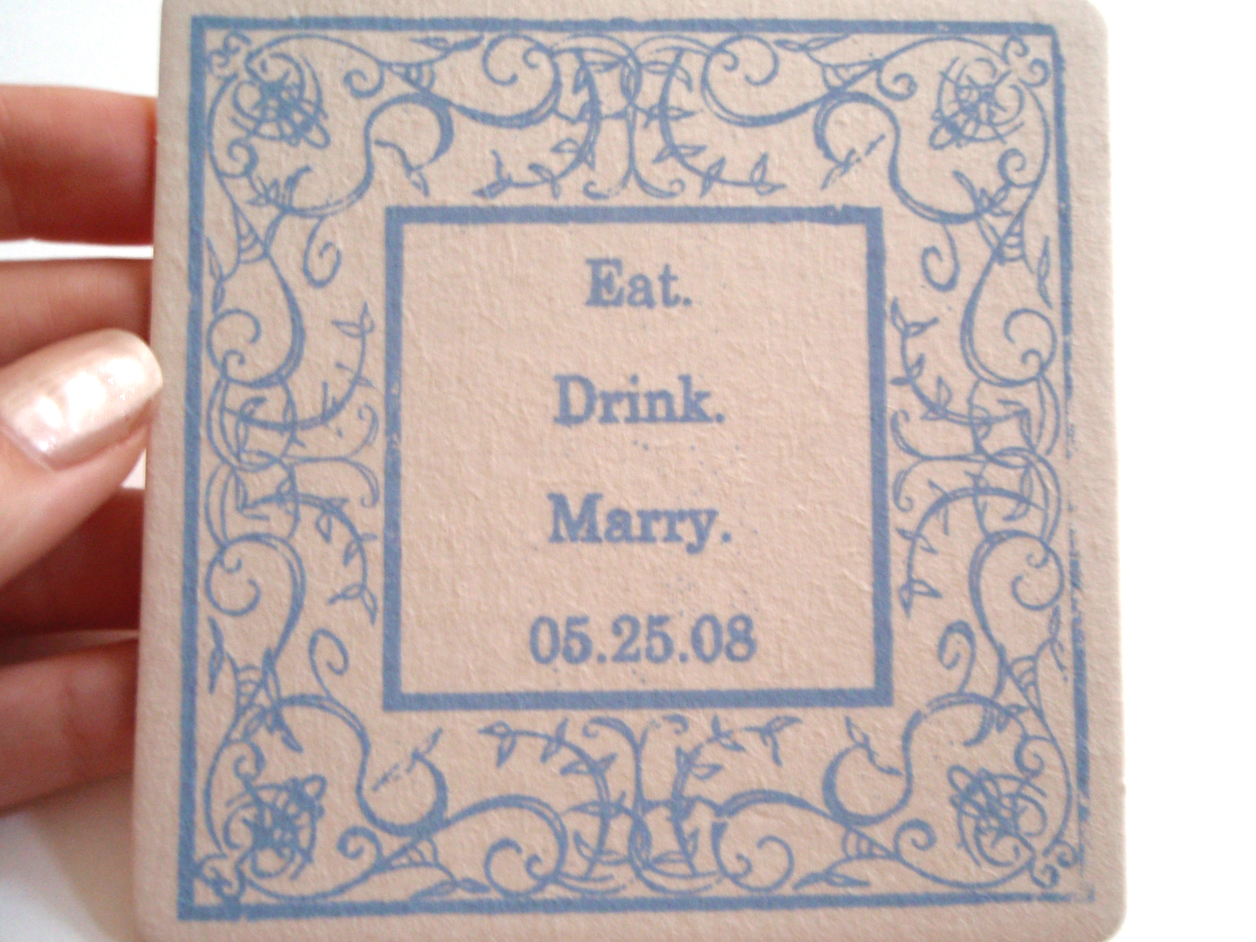
{photo by me}
The reserved seating cards were also driven by practical considerations — since our families would be walking down the aisle during the processional, we wanted to make sure that other guests didn’t mistakenly sit in their seats. We used scalloped flat note cards from Paper-Source, and printed them using purple and yellow ink.
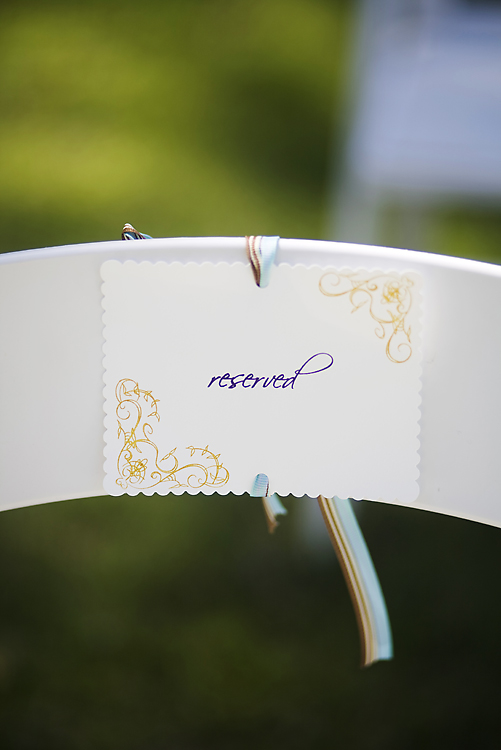
{photo by Punam Bean}
That’s it for today, but I’ll be back tomorrow with more projects to share with you!